
custom embroidered patches offer a versatile way to express brand personality, celebrate teams, or show personal flair on jackets, bags, caps, and uniforms across a wide range of settings, including teams, clubs, communities, and personal wardrobes. From color psychology to bold silhouettes and clean outlines, embroidered patch design ideas shape legibility, scale, and impact, ensuring readability whether viewed from afar or up close in studio lighting, or under showroom displays. Understanding patch production techniques helps you balance artistry with practicality, delivering patches with crisp edges, balanced stitch density, and reliable color matching across runs and on a variety of fabrics such as twill, denim, and cotton. The choice between iron-on patches vs sew-on patches matters for application, durability, and laundering expectations, so you can tailor the finish to how customers will wear and care for their patches, with consideration for care cycles and garment seams. When you align concept, materials, and finishing, you can craft patches that travel with confidence and tell your story long after they’re sewn or pressed on, becoming durable branding assets that resist wear over time.
LSI-friendly language, you’ll often hear fabric emblems, embroidered badges, and cloth insignias used interchangeably with patches to describe the same accessory. Applied terms like appliques and sewn artwork help readers and search engines connect ideas about durability, colorfastness, and texture across garments. In practice, the goal is to secure consistent branding and a premium feel, whether you’re discussing iron-on features, merrow borders, or backing options. By framing the subject with these related terms, you guide readers through the broader ecosystem of garment embellishments while keeping the focus on quality, consistency, and long-term wear.
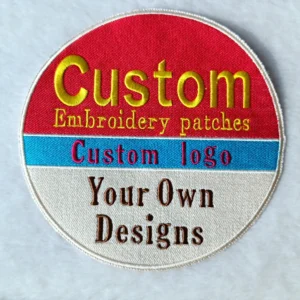
Custom embroidered patches: Design for Brand Impact
Custom embroidered patches act as durable ambassadors for your brand, team, or personal expression. Start with a clear goal: what message do you want the patch to communicate, who will wear it, and where will it shine? This is where custom embroidered patches become durable ambassadors that tell a story long after they’re sewn or stuck onto a jacket, backpack, or uniform.
During the idea phase, consider what design elements will carry that message across sizes. Bold silhouettes, high-contrast color schemes, and clean outlines reproduce crisply on fabric. Think about embroidered patch design ideas that translate well into stitching, with strong negative space and legible typography to keep the focal point clear at small sizes.
Embroidered Patch Design Ideas: From Concept to Clear Visuals
Exploring embroidered patch design ideas helps you translate ideas into stitches that pop. Designs with bold silhouettes, high-contrast color schemes, and clean outlines reproduce crisply on fabric, whether it’s a cap, lapel, or backpack patch. Think about how the concept scales: will it stay legible at a tiny 1-inch size or expand for a 4-inch display? Strong negative space and readable typography keep the focal point clear across sizes.
Additionally, consider your source artwork. Starting with a strong vector version preserves lines and shapes when scaled, while a well-prepared mock-up on fabric lets you evaluate color accuracy, edge quality, and overall balance before you commit to production. The goal is to align creative intent with production realities so your patch design ideas translate into high-quality embroidered patches.
From Artwork to Reality: Patch Production Techniques and Digitizing
Turning artwork into a stitch-ready patch follows a practical workflow. After finalizing a vector, digitizing converts it into machine-ready stitch commands, selecting suitable stitch types, densities, and underlay to support color blocks and outlines. This sequence—digitizing, sample making, and color testing—comprises core patch production techniques that determine how faithfully the final patch represents the original art.
Producing a swatch or proof copy before full runs minimizes risk. It gives you a chance to inspect stitch density, edge finish, and color accuracy under different lighting. A reliable patch producer will guide you through these checks and provide color proofs so you can approve a production file that delivers consistent results across batches and materials, contributing to the overall perception of high-quality embroidered patches.
Materials, Threads, and Finishes: Building Durable, High-Quality Patches
The backing and fabric choice influence texture, durability, and washability. Satin stitches outline boundaries with crisp edges, while fill stitches fill larger color blocks for solid areas. Selecting thread colors with Pantone-matching helps ensure consistency across production runs, though lighting can shift hues slightly, so color proofs are advisable. Merrow borders, backing choices, and protective topcoats all contribute to a premium feel that signals high-quality embroidered patches.
Experiment with a balanced mix of stitch types and consider backings suited to your use case. An iron-on backing offers quick placement for consumer items, while a sew-on backing delivers maximum durability in uniforms or workwear. For added longevity, specify professional finishing options like edge merrowing and a protective topcoat to keep colors intact through repeated wear and washing.
Iron-On Patches vs Sew-On Patches: Choosing the Right Backing
Iron-on patches vs sew-on patches presents a choice shaped by application, laundering, and audience expectations. Iron-on patches are convenient for temporary branding at events or clubs, but frequent washing or heat exposure can shorten adhesion. Sew-on patches tend to withstand more demanding environments, especially on uniforms or outdoor gear where stitching is relied upon for long-term durability.
If you’re unsure which backing to pick, a patch producer can help by showing samples with both options and explaining care instructions. Some designs even fuse both methods: a heat-activated adhesive for initial placement, followed by stitching to lock the patch in place. This approach delivers flexibility without compromising the patch’s longevity or appearance.
Quality Assurance and Market Readiness: Delivering High-Quality Embroidered Patches
To ensure your patches meet expectations, maintain a disciplined approach to color management, edge accuracy, and backing selection. Outline a clear specification for Pantone-matched threads, obtain color proofs, and request production swatches to verify performance before full runs. These steps contribute to consistently high-quality embroidered patches that look polished in any setting.
Planning for cost, lead times, and branding goals helps you bring patches to market confidently. By balancing thoughtful embroidery patch design ideas with rigorous patch production techniques, you can deliver patches that reinforce brand identity, reward teams, or serve as collectible items. When you prioritize testing, proofs, and reputable production partners, your final patches are more likely to stand out in a competitive marketplace.
Frequently Asked Questions
What are the essential steps to design and produce custom embroidered patches?
Designing and producing custom embroidered patches starts with a clear concept, then translating that idea into embroidered patch design ideas. Create vector artwork, then digitize it for stitch commands. Request a swatch or proof to verify stitch density and color accuracy. Understand patch production techniques like underlay, stitch types, and color matching, then choose materials, backing, and edge finish (such as a merrow border) before full production. The result is high-quality custom embroidered patches that translate well from concept to finished product.
How can I brainstorm embroidered patch design ideas for custom embroidered patches that read well on various sizes?
Start with embroidered patch design ideas that translate across sizes. Favor bold silhouettes, high-contrast colors, clean outlines, and strong negative space to keep legibility on small items. Convert concepts into vector art and then digitize with appropriate stitch types and density. Always test at small scales and request proofs before production.
What are patch production techniques I should know when creating custom embroidered patches?
For custom embroidered patches, key patch production techniques include digitizing artwork into stitch commands with proper density and underlay; producing a sample run to confirm fidelity; conducting color testing across batches and lighting; and moving to full-scale production with consistent machine settings and QA.
Iron-on patches vs sew-on patches: which should I choose for custom embroidered patches?
Iron-on patches are convenient for quick application, but may wear faster with frequent washing. Sew-on patches offer greater durability, especially on uniforms or outdoor gear. Some projects use a combination—sew-on with an iron-on backing—to balance ease of use and longevity in your custom embroidered patches.
How can I ensure my custom embroidered patches are high-quality?
To achieve high-quality embroidered patches, use Pantone-matched threads and provide color proofs for consistency in custom embroidered patches. Prioritize legible typography, clean outlines, and strong negative space, and finish with a durable backing such as a merrow border. Work with a reputable patch producer and review swatches to validate color, density, and edge quality.
What common mistakes should be avoided in custom embroidered patches, and how do lead times and costs work?
Common mistakes include overly complex designs that lose detail when scaled, inconsistent color across batches, and insufficient stitch density. For lead times, plan around artwork handoff, digitizing, and proofs; budget for digitizing, color proofs, swatches, and minimum production quantities. Prototyping early helps reduce revisions and keeps your custom embroidered patches on schedule.
| Aspect | Key Points |
|---|---|
| Purpose & Concept | Start with a clear goal (brand recognition, team reward, or collectible) and a strong design concept that communicates the message. |
| Design Considerations | Use bold silhouettes, high-contrast colors, clean outlines; ensure legibility at small and large sizes; leverage negative space. |
| Digitizing & Artwork | Begin with vector artwork; digitizing translates artwork into stitch commands; manage thread density and underlay for clean edges; work with a skilled digitizer. |
| Materials & Threads | Choose fabrics, stitch types (satin, fill, running); Pantone-matched threads; consider backing and merrow border for premium look. |
| Color Proofing | Pantone color management helps consistency; request color proofs due to lighting shifts; test color across batches. |
| Production Workflow | Digitizing → sample making → color testing → full-scale production; use mock-ups to evaluate colors, borders, and proportions. |
| Backings & Finishes | Backings: iron-on, sew-on, or adhesive; finishes like protective film or topcoat; merrow border for durability and premium feel. |
| Quality & Cost Management | Balance stitch density, size, and edge finish; obtain swatches/proofs; cost drivers include size, stitch count, backing, finish, and quantity. |
| Common Mistakes | Overly complex designs, color inconsistency, insufficient stitch density, incompatible backing/edge finishes, skipping proofs/tests. |