
A custom roll up banner on a budget can grab attention at events, trade shows, or retail displays. The goal is to combine clear messaging with brand consistency while keeping production costs under control, turning your banners into portable advertising banners. A well-planned layout helps you stand out even with budget limits. Design with a strong focal point, high contrast, and concise copy to communicate value at a glance. Pair smart design with cost-efficient printing to maximize impact without overspending.
Viewed through an alternative lens, the topic centers on cost-effective signage, portable display options, and compact banner stands. LSI-minded phrasing might reference promotional signage, trade show displays, and lightweight, print-ready banners that convey your message clearly. These terms help search engines see the same concept from related angles, improving relevance without duplicating content. Ultimately, the emphasis remains on clarity, contrast, and consistent branding within a budget.
Budget-Driven Goals for a Budget-Friendly Roll Up Banner Design
Start with a budget-driven plan that aligns messaging with audience and venue. Define the primary message, identify your target readers, decide where the banner will be displayed, and estimate how often it will be used. Framing these questions upfront helps you choose a practical size, finish, and how much to invest in hardware and printing. This approach supports a budget-friendly roll up banner design by keeping focus on impact rather than excess.
Even a custom roll up banner on a budget can look polished if you keep a strong focal point, high contrast, and consistent branding. This mindset reinforces that portable advertising banners can deliver premium results when the planning is clear and costs are controlled.
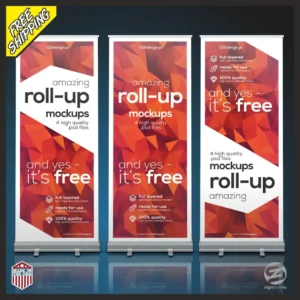
Design Essentials: Bold, Simple, and On-Brand for Portable Advertising Banners
Design essentials for a budget-friendly roll up banner design center on a single, memorable focal point, bold typography, and a practical color scheme. Use a strong headline readable from a distance and limit typography to two fonts to cut production complexity and cost. These roll up banner design tips help you maximize readability while keeping visuals simple.
Keep content concise (20–40 words) and align with your brand colors and logo. A clean grid, safe margins, and consistent branding reduce the risk of misalignment during printing and support a premium appearance—even with inexpensive materials. Portable advertising banners rely on deliberate layout choices that translate across vendors.
Materials and Printing: Cost, Durability, and Quality Trade-offs
Materials play a major role in cost and durability. Vinyl banners are durable and budget-friendly for indoor use, while fabric banners offer a premium feel with less glare, and PVC backings add rigidity. Choosing the right material balances price with performance for budget-conscious campaigns. For cost-conscious projects, cheap roll up banner printing can be a smart option for short-term use.
Printing approach matters too: print-ready artwork, standard sizes, and proofs help avoid surprises. High-volume or offset printing can bring unit costs down, but require precise bleed and crop marks. By building files compatible with many vendors, you simplify comparisons and keep costs predictable.
DIY and Production: From Layout to Print on a Budget
DIY and production steps let you trim costs while preserving impact. Prepare artwork to the exact final size (for many standard roll up banners, common widths are 850 mm or 1000 mm with a height around 2000 mm) and plan a simple layout with one clear message, a call to action, and branding. This is the core of a practical workflow for a DIY or semi-DIY roll up banner.
Opt for vector logos, 300 dpi images at final size, and include bleed and safe zones. Export as the vendor requests (PDF, TIFF, or high-res PNG) and confirm CMYK color mode. If you can design in-house and outsource printing, you get a strong result at a lower cost than full production outsourcing.
Smart Sourcing: Budget Vendors and Affordable Printing Options
Smart sourcing helps you maximize value. Gather quotes from multiple vendors, ask for a treatment plan, and request a single digital proof to confirm layout, color, and typography. Seek vendors that specialize in promotional materials and offer budget-friendly options with reasonable turnarounds for cheap roll up banner printing.
Look for warranties or satisfaction guarantees, which reduce risk and potential waste. Consider bulk purchases if you plan more banners in the future, and explore local print shops for color matching and faster turnaround. These strategies align with roll up banner design tips that emphasize clarity, consistency, and cost control.
Test, Iterate, and Scale: From Prototype to Campaign-Ready
Test, proofs, and iteration are essential for a campaign-ready roll up banner. Use a digital proof to verify legibility, color accuracy, and alignment before full production, then check in real-world venues to ensure readability under lighting conditions. This practice supports budget-conscious campaigns by catching issues early and avoiding costly reprints.
Scale thoughtfully: refine the layout, reduce unnecessary elements, and reuse branding assets across events. A well-planned, budget-friendly roll up banner design improves return on investment by drawing attention, communicating value, and guiding action at events and storefronts. As you gain experience, you’ll gather insights on what elements most influence cost and impact, and you’ll apply the roll up banner design tips to future banners.
Frequently Asked Questions
How can I create a custom roll up banner on a budget while still looking professional?
Start with a clear budget and goal for your custom roll up banner on a budget. Keep the design simple yet bold: one focal point, two fonts, high contrast, and a concise 20–40 word message. Choose cost-effective materials like vinyl and request a print-ready file with standard sizes, bleed, and safe margins to simplify quotes from vendors.
What are budget-friendly roll up banner design tips to make a custom roll up banner on a budget feel premium?
Follow roll up banner design tips that balance cost and impact: a strong focal point, brand-consistent elements, two fonts, and minimal copy. Use a clean grid and safe zones to ensure easy production across vendors, which helps maintain a budget-friendly roll up banner design outcome.
Is cheap roll up banner printing a viable option for a DIY roll up banner project on a budget?
Cheap roll up banner printing can work well for short-term needs when you provide print-ready artwork and request a color proof. Stick to standard sizes, obtain a digital proof, and consider higher-volume printing for lower per-unit costs. Keep the design simple and ensure CMYK color mode to minimize surprises, especially for a DIY roll up banner project.
What should I know about materials for portable advertising banners to keep costs down?
For portable advertising banners on a budget, compare vinyl, fabric, and PVC backings. Vinyl is typically the most cost-effective and durable for indoor use, while fabric delivers a premium look at a higher cost. Consider matte finishes to reduce glare in bright venues and preserve legibility.
What steps are involved in a DIY roll up banner that keeps the project within a budget on a custom roll up banner on a budget?
DIY steps include preparing final-size artwork (often 850–1000 mm wide by ~2000 mm tall), designing with a single clear message, using vector logos, and ensuring images are 300 dpi or higher. Include bleed and safe zones, export print-ready files (PDF/TIFF/PNG) in CMYK, and request a proof to confirm colors before printing.
How can I source affordable options for budget-friendly roll up banner design and cheap roll up banner printing without sacrificing quality?
To source affordably, compare multiple vendors, request a single digital proof, and check warranty options. Consider local print shops for flexible pricing and in-person color matching, and plan for bulk ordering if you’ll need additional banners later. This approach aligns with budget-friendly roll up banner design goals while maintaining quality and reliability.
| Aspect | Key Points |
|---|---|
| Budget and goals | Define the primary message, target audience, display context, and usage frequency; decide size, finish, hardware, and printing budget. |
| Design essentials | Strong focal point; two fonts; high-contrast color palette; concise copy (20–40 words); brand consistency; grid, margins, and safe zones for consistent reproduction across vendors. |
| Materials and printing options | Vinyl: durable and cost-effective; Fabric: premium look but pricier; PVC backings add rigidity; Printing: cheap for short-term; high-volume/offset for lower unit costs; print-ready artwork with standard sizes, bleed, and safe margins. |
| DIY and production | Prepare artwork at final size (e.g., 850–1000 mm wide by ~2000 mm tall); keep layout simple with a single message and branding; use vector logos; 300 dpi or higher; include bleed and safe zones; export as CMYK print-ready files. |
| Quality checks and durability | Carry case with protective sleeve; low-glare matte finish; robust base and stands for travel; protective edge seals or corner guards for high-traffic handling. |
| Sourcing on a budget | Compare quotes from multiple vendors; request a single digital proof; look for warranties; consider bulk orders; seek local printers for color matching and flexibility; verify proofs before final print. |
Summary
custom roll up banner on a budget demonstrates that you can achieve a premium look without overspending by focusing on clarity, branding, and smart sourcing. Define your budget and goals, design for impact with a strong focal point and high contrast, choose cost-effective materials, and leverage DIY layout with print-ready files to maximize results at events, storefronts, and trade shows. With careful planning, you can deliver professional banners that attract attention and drive action while keeping costs predictable.