
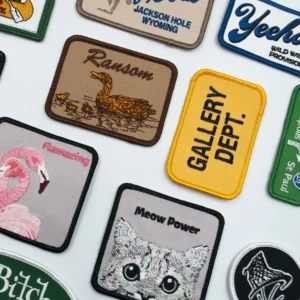
Embroidered patches are a versatile way to express personality, repair wear, or customize clothing and accessories. Whether you’re revamping a denim jacket, jazzing up a backpack, or adding a personalized touch to kid’s uniforms, Embroidered patches offer a durable, colorful solution. This guide covers two popular methods—iron-on patches and sew-on patches—so you can pick the option that best fits your fabric and design. Along the way you’ll find patch application tips, care instructions, and quick fabric troubleshooting to keep your patches looking bold wash after wash. By the end, you’ll feel confident about choosing the right method and applying patches like a pro with DIY clothing patches.
Beyond the direct term, this craft can be explored as fabric badges, textile emblems, or decorative appliqués that attach with heat or stitching. These fabric motifs let you personalize gear, upgrade worn areas, or create a cohesive look across outfits, backpacks, and uniforms. Whether you choose heat-activated designs or stitched-on motifs, the goal is durable adhesion and a clean finish that withstands wear. Approaches such as iron-on backing or sewn borders reflect practical choices, and awareness of fabric type guides where to apply each method. If you’re just starting, focus on alignment, test patches on scrap fabric, and consider combining techniques for extra security.
Embroidered Patches: A DIY Clothing Patches Guide
Embroidered patches offer a simple, expressive way to refresh garments, backpacks, or accessories. In the DIY clothing patches realm, you’ll often weigh two popular methods—iron-on patches for speed and sew-on patches for long-term durability—while the embroidery provides color and texture that can tell a story.
Before you start, review fabric type, backing options, and pre-wash care. This guide emphasizes patch application tips and helps you choose the right method for denim, canvas, twill, or knit fabrics. Embroidered patches are versatile, but knowing when to use iron-on patches or sew-on patches will save you time and frustration on everyday wear.
Iron-On Patches vs Sew-On Patches: Pros, Cons, and Best Fabric Matches
Choosing between iron-on patches and sew-on patches depends on fabric type, wear pattern, and laundering. Iron-on patches bond quickly with heat, making them ideal for sturdy fabrics like denim, canvas, and twill, while sew-on patches rely on stitching for long-lasting security on stretch or delicate fabrics.
If durability and washability are priorities, sew-on patches often win. You can also extend security by combining methods—iron-on patches first, then stitching around the edges for extra protection, a classic patch application tips approach.
Patch Application Tips for Beginners: Prep, Placement, and Pressing Techniques
Patch Application Tips for Beginners start with prep: ensure a clean, dry surface and test the patch location on scrap fabric. Align the design so it reads correctly when worn, and consider chalk lines for accuracy before you apply heat or thread.
Next, choose your method. For iron-on patches, place parchment paper over the patch and press with a dry iron at the fabric’s highest safe setting, moving across the area to avoid heat buildup. For sew-on patches, gather a sharp needle and strong thread, use pins or clips to hold the patch, and stitch around the edge with a tight, neat finish.
Troubleshooting Common Patch Installations: Edges Lifting, Puckering, and Adherence Issues
Troubleshooting common patch installations helps you solve stubborn set-ins: edges lifting, puckering, or patches not adhering at all. Start by reassessing fabric compatibility, backing type, and heat/pressure settings.
To fix issues, re-press with parchment paper and allow more cooling time for iron-ons, or switch to sew-on stitches for added security on stretchy fabrics. For durable results, a light zigzag or whip stitch around the border can lock the edge and prevent fraying.
Creative Uses for DIY Clothing Patches: Backpacks, Hats, Jackets, and More
Creative uses for DIY clothing patches extend far beyond repairs. Embroidered patches can customize backpacks, hats, jeans, jackets, and even school uniforms, letting you tell a personal or team story through color and texture.
You can cluster several patches for a collage effect or create a strip to cover a worn seam. Both iron-on patches and sew-on patches adapt to casual fashion or kids’ projects, giving you flexibility to patch and personalize with confidence.
Care, Maintenance, and Longevity of Patch-Enhanced Garments: Washing, Drying, and Re-Patching
Care and maintenance of patch-enhanced garments means treating patches with gentle routine: turn garments inside out, wash on a gentle cycle, and avoid high heat that could lift edges.
Over time, reattach patches after several washes if needed, and store finished items flat or carefully folded to prevent creases. Following care instructions helps your embroidery stay vibrant, whether you used iron-on patches or sew-on patches.
Frequently Asked Questions
What are embroidered patches and how do they fit into DIY clothing patches?
Embroidered patches are small fabric pieces with stitched designs that can be attached to garments, backpacks, hats, and more. They come with backing options such as iron-on adhesives or sew-on edges. This makes them a popular choice for DIY clothing patches, repairs, and customization because of their durability, color, and texture.
How do iron-on patches differ from sew-on patches for clothes?
Iron-on patches use a heat-activated adhesive on the patch backing, which bonds to fabric with heat and pressure. Sew-on patches rely on stitching to secure the patch and are typically more durable on stretch fabrics or items washed frequently. You can even combine both methods for extra security on embroidered patches, but always consider fabric type and patch instructions.
What are essential patch application tips for applying embroidered patches?
Patch application tips include: prep a clean, dry surface; test patch location on a scrap; choose the appropriate method (iron-on or sew-on); use parchment paper for iron-on patches; apply heat for 15–30 seconds with even pressure; check edges and let cool; for extra security, sew around the edges after applying iron-on.
Can I use both iron-on patches and sew-on patches on the same item for extra security?
Yes. A common approach is to apply iron-on patches first for quick adhesion and then sew around the edges for durability. This is especially helpful on high-use areas or fabrics that wear out with washing, and it works well with embroidered patches.
How should I care for garments with embroidered patches to extend their life?
Care for embroidered patches by turning garments inside out and washing on a gentle cycle. Avoid high heat in dryers and consider air drying. Follow patch-specific instructions and reattach or sew around patches if edges begin to lift after multiple washes.
What are common issues with embroidered patches and how can I troubleshoot them?
Common issues include edges lifting, patches not adhering, puckering, or fraying. Troubleshoot by checking heat settings and pressure, re-pressing with parchment paper, allowing longer cooling, testing on scrap fabric, and considering resewing the patch edge with a tight stitch to prevent fraying.
| Aspect | Overview | Practical Tips |
|---|---|---|
| What Are Embroidered Patches? | Small fabric pieces with stitched designs that attach to garments, bags, hats, etc. Backing options include iron-on adhesives, sewn borders, or a combination for extra security. Durable, textured, and able to tell a story or display a logo. | Choose patches for the item and backing that match fabric and washing needs; test on a small area first; use on durable fabrics for iron-ons. |
| Choosing the Right Method: Iron-On vs Sew-On | Iron-on patches use a heat-activated adhesive and bond with heat and pressure; fast and convenient, ideal for sturdy fabrics like denim, canvas, and twill. Sew-on patches rely on stitching and are more durable, especially on stretch fabrics or items that see frequent washing. | If unsure, combine methods (iron-on first, then sew edges); test fabric area first; avoid heat on delicate knits or synthetics. |
| Tools and Materials | A list of items including clean surface, iron-on or sew-on patches, parchment paper, dry iron, needle, thread, scissors, pins, fusible web or fabric glue (optional), pressing mat, heavy flat weight, spray bottle. | Prepare a tidy workspace; test patch on scrap fabric; set up a flat surface for accurate placement. |
| Important Fabric Considerations | Different fabrics react differently to heat and stitching. Denim, canvas, twill, and heavy cotton tolerate iron-ons; lightweight knits and synthetics may warp—use sew-on or testing, and consider a pressing cloth. | Always pre-wash and dry items before patching to avoid post-patch shrinkage; test patches on scrap fabric first. |
| Iron-On Patches: Step-by-Step | Prep surface, test location, set dry iron to appropriate high setting, cover with parchment, press patches 15–30 seconds, re-press edges if needed, let cool, optional weight for longer bond, wait 24 hours before washing. | Follow patch instructions for heat; avoid steam; ensure patch lies flat; cool completely before handling. |
| Sew-On Patches: Step-by-Step | Position and pin, choose strong thread and needle, stitch around perimeter (running or whip stitch); for machines, use zigzag or satin stitch; keep stitches close to edge; tie off and trim; lightly press to set stitches; turn garment inside out during washing. | Ensure stitches are even and patch lies flat; use proper tension and allow edge finishing for a clean look. |
| Quick Tips for Both Methods | Test on scrap fabric; align patches for readability; use a flat surface; avoid steaming hot irons on iron-ons; sewing adds durability on stretch fabrics; consider combining methods; add small stitches around edges as needed. | Good practice: test first, plan design from wearer’s perspective, press carefully, and opt for gentle washing cycles. |
| Troubleshooting Common Issues | Patch won’t adhere: adjust heat/pressure, re-press with parchment, cool longer. Edges lifting: re-apply heat and sew around edges. Puckering or fraying: pre-warm area, use pressing cloth, or secure with tight stitches. | Reassess fabric choice or method if issues persist; consider reattaching with additional stitches. |
| Care and Maintenance for Patch-Enhanced Garments | Turn inside out for washing; avoid high heat; store flat or carefully folded; reattach patches after multiple washes if needed. | Gentle cycles, air dry when possible; inspect patches regularly and re-sew when edges show wear. |
| Creative Ideas and Use Cases | Customize backpacks, hats, jeans, and jackets; cluster patches for a collage; tell a story or show a logo; apply to teacher apparel, team uniforms, or kids’ school projects. | Experiment with placement and mix iron-on and sew-on for unique, durable results. |