
Caring for Embroidered Patches is a mindful routine that helps preserve color, stitch integrity, and the garment’s overall look, whether patches sit on a vintage denim jacket or a modern tote bag, and it benefits from a calm, patient approach that respects both fabric and thread, and this mindful practice also helps you avoid expensive replacements and keeps sentimental patches legible. When you consider embroidered patches cleaning, you learn to treat dirt without soaking threads, accommodate different fabrics, adapt methods to dense satin stitches or lightweight backing, and to separate iron-on and sew-on patches to prevent crosscontamination. The patch care tips in this guide emphasize gentle handling, correct water temperature, and choosing a mild detergent that preserves color and texture, while avoiding aggressive brushing that can loosen stitches. If damage occurs, knowing how to repair patches, including reattaching edges, resecuring frayed borders, and replacing backing when needed, saves wear and maintains the original design, even on stubborn fabrics. By building a simple, regular routine focused on patch longevity and sewing patch maintenance, and by storing worn items away from direct sun, you can enjoy vibrant patches for many seasons with minimal upkeep.
Beyond the basics of cleaning, patch upkeep for decorative embroidery covers how to protect threads, stabilize the backing, and maintain attachment strength on clothes and bags. In LSI-friendly language, this topic can be described as embroidery badge maintenance, sewing patch care, and textile embellishment care—terms that signal related ideas like backing stability, colorfastness, and wear resistance. A thoughtful approach to garment adornments emphasizes routine inspection, gentle cleaning, and timely repairs to ensure every patch continues to tell its story.
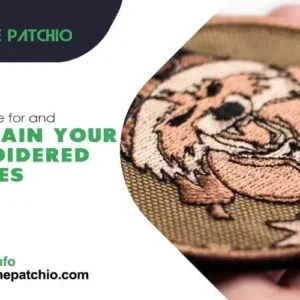
Caring for Embroidered Patches: Core Principles for Longevity
Caring for embroidered patches starts with understanding that gentle handling and consistent routines yield the best results. The foundation of patch longevity is regular inspection, careful cleaning, and smart storage practices that reduce stress on threads and fabric. When you approach this task with patience, you protect the embroidery’s color and structure, ensuring the patch continues to tell its story for years to come.
Adopting a mindful approach to sewing patch maintenance means recognizing how different fabrics and backings respond to wear. By prioritizing low-stress routines—avoiding aggressive washing, limiting heat exposure, and using backing stabilizers when needed—you extend both the visual appeal and the functional life of each patch. This mindset aligns with practical patch care tips that balance cleanliness with preservation.
Embroidered Patches Cleaning: Safe Step-by-Step Techniques
Cleaning embroidered patches should begin with the least invasive method and escalate only as necessary. Dry brushing or gentle dusting with a soft brush removes loose dirt without disturbing stitch integrity, serving as a reliable kickoff to embroidered patches cleaning.
When deeper cleaning is required, opt for spot cleaning with a mild detergent and cool water, then proceed to hand washing the patch if removable. If the patch is sewn on, use a gentle cycle on cold with the garment inside a mesh bag, but never tumble-dry. These steps support successful cleaning while preserving color and thread integrity.
Patch Care Tips for Everyday Wear: Preserving Color and Stitch Integrity
Everyday wear subjects patches to sun, friction, and environmental exposure. To protect their color and embroidery, place patches away from direct sunlight when possible and avoid washing with heavy items that can snag edges. Implementing this patch care tips mindset helps keep threads vibrant and reduces the risk of fraying.
Edge protection is a practical consideration for patches on high-movement areas. Reinforcing borders with a light zigzag stitch or applying a small backing can minimize wear over time. By integrating these routines into daily garment care, you extend the life of your patches without compromising their appearance.
How to Repair Patches: Simple DIY Fixes for Longevity
Repairing patches is a cost-effective way to maintain the original look of a garment. When edges lift or a patch starts to peel, reattach it with color-matching thread using small, even stitches that lie flush to the fabric. This basic approach embodies how to repair patches without creating bulk or puckering.
For more durable repairs, reinforce frayed edges with a tight zigzag stitch and consider replacing a worn backing. Restitching designs or adding a light stabilizer behind the patch helps distribute stress and preserve the embroidery over time, illustrating practical methods to maintain patch longevity.
Patch Longevity: Extending Life with Gentle Maintenance
Longevity for patches comes from a steady, gentle maintenance routine rather than heroic fixes. Schedule light cleaning at regular intervals, check for loose threads, and address glue residue before it soils fabrics. Such proactive care reduces cumulative wear and supports longer-lasting patches.
Color preservation and fabric compatibility are central to patch longevity. Avoid prolonged heat, store garments in breathable bags, and use gentle detergents to minimize color bleed. Keeping these principles in mind helps the patches remain vibrant and intact through many seasons.
Sewing Patch Maintenance: Tools, Tips, and Routine Practices
A compact repair kit makes sewing patch maintenance practical and efficient. Stock essentials like sharp embroidery needles, color-matched floss, small scissors, and a seam ripper so you can tackle issues as they appear. These tools support ongoing patch longevity by enabling precise, minimal-impact fixes.
Adopt a simple maintenance routine: inspect patches during wardrobe changes, perform light cleaning every few months, and test any adhesive or backing change on an inconspicuous area first. This steady practice embodies sewing patch maintenance and helps ensure patches continue to look deliberate and well-integrated with your clothes.
Frequently Asked Questions
In Caring for Embroidered Patches, what are the essential steps for cleaning to protect patch longevity?
Begin with gentle cleaning: dry brush or dust with a soft cloth to remove loose dirt, then spot clean stains using a mild detergent solution (1:10 detergent to water). If the patch is removable, hand wash in lukewarm water; if it’s firmly attached with a sturdy backing, a cold-water machine wash in a mesh bag on a gentle cycle can be used. Do not tumble-dry; lay flat to air-dry away from direct sunlight. If pressing is needed, use a cotton cloth and low heat. Choose a detergent without harsh whiteners to help preserve colors and patch longevity.
How does backing type affect Caring for Embroidered Patches and cleaning outcomes?
Backings influence washing and heat exposure: adhesive and iron-on backs can weaken with moisture, while sew-on patches are generally more durable but still benefit from gentle care. If unsure of backing, test on an inconspicuous area first. For iron-on patches, consider removing the patch before washing or reapplying afterward. When in doubt, opt for gentler cleaning methods to protect patch longevity.
In Caring for Embroidered Patches, what are simple methods for how to repair patches?
For DIY repairs: reattach a loose patch by sewing with color-matched thread along the border using small, even stitches; reinforce frayed edges with a tight zigzag stitch; replace a worn backing with a similar-weight backing and secure it with careful hand-stitching; restitch any loose embroidery if needed, and consider a lightweight backing stabilizer for high-wear patches to preserve fabric integrity.
In Caring for Embroidered Patches, which detergents and water temperatures are recommended for cleaning?
Use a mild detergent free from harsh whiteners or optical brighteners. Cold or lukewarm water is safer and effective for most cleaning; hot water can cause color bleeding or thread shrinkage, especially on vintage or delicate patches. If stains persist after gentle spot cleaning, repeat the process rather than scrubbing aggressively.
What patch care tips help extend patch longevity through storage and routine wear?
Protect patches from direct sunlight to prevent fading; when attached, avoid washing with items that can snag or rub; reinforce edges if fraying is starting; for high-wear areas, add light border stitching or backing stabilizer; store garments in a breathable bag to minimize dust and moisture; schedule regular, light cleaning to maintain embroidery integrity.
From a patch care tips perspective, what should you do when you encounter common patch issues like color bleeding or fraying, and how to repair patches?
If colors bleed, rinse with cold water and blot; for stubborn stains, use a color-safe stain remover designed for delicate embroidery. For fraying, apply a tight zigzag stitch along the border to seal edges. If there’s glue residue from iron-on backs, gently lift the edge and wipe with a small amount of rubbing alcohol on a cotton swab. For loose edges, tie off with a fine needle and, if needed, resew the patch to restore durability.
| Aspect | Key Point Summary | Practical Tips |
|---|---|---|
| Cleaning Foundation | Cleaning aims to remove dirt without harming embroidery, backing, or fabric; patches sit on different fabrics and may use various backings. |
|
| Step-by-Step Cleaning | Follow a progressive sequence to protect color and stitching: dry brushing; spot cleaning; hand wash if removable; machine wash with caution; proper drying. |
|
| Detergent & Water | Choose mild detergent free from harsh whiteners or optical brighteners; hot water can bleed colors or shrink threads; cold or lukewarm water is safer. |
|
| Backings & Fabric Compatibility | Backings influence washing; iron-on backs may weaken with moisture/heat; sew-on patches need secure stitching; test on a small, inconspicuous area first. |
|
| Longevity & Fabric Care | Longevity depends on gentle cleaning, stitch integrity, and compatibility with fabric; protect colors via storage and wear practices. |
|
| Patch Care Tips (Real-World Scenarios) | Practical, everyday guidance across environments like urban wear, uniforms, and hobbies. |
|
| Repairs & Maintenance | Basic repair methods save time and preserve appearance. |
|
| Tools & Materials | A small repair kit supports quick fixes. |
|
| Maintenance Routine | Establish a simple routine to monitor and protect patches over time. |
|
| Troubleshooting | Common issues and practical fixes to prevent patch damage. |
|
| Real-World Examples | Case studies illustrate how small improvements extend life and preserve aesthetics. |
|
Summary
Conclusion: Caring for Embroidered Patches is a practice of mindful cleaning, thoughtful maintenance, and patient repairs. By following proper cleaning methods, protecting colors, and performing timely repairs, you can extend patch longevity and preserve the personality each patch adds to your wardrobe. Treat patch care as a routine habit rather than a one-off task, and embroidered patches will continue to tell their stories on your clothes and accessories for many seasons to come. Caring for Embroidered Patches stays central to keeping patches vibrant, intact, and ready for new adventures.