
Learn how to attach embroidered patches to clothing and gear with confidence. This guide covers backing options, from iron-on patches how-to basics to sew-on patches tutorial tips. Whether you’re revamping a jacket, backpack, or denim, applying embroidered patches correctly helps durability and a tidy finish. We break down iron-on, sew-on, and adhesive backing patches, so you can choose the best method for your fabric and care routine. By the end, you’ll be ready to attach patches with a professional, long-lasting look.
Viewed through an LSI lens, patch application on fabrics centers on the interplay between fabric type, backing choice, and edge finishing. So you can think in terms of heat-activated adhesives, stitched borders, or sticky backings—each path offers its own balance of speed and durability. Choosing the right approach depends on wash cadence, wear patterns, and whether you want a temporary decoration or a long-term embellishment. Explore related terms like decorative fabric embellishments, badge placement, and textile adornments to widen your understanding of how patches work.
How to attach embroidered patches: Choosing backing, prep, and technique
Attaching embroidered patches starts with choosing the right backing and preparing the fabric. The three common options—iron-on patches, sew-on patches, and patches with adhesive backings—each have different strengths depending on fabric type, washing frequency, and wear. When planning your project, consider how the garment will be worn and how often it will be laundered to pick the best backing for longevity and a clean finish.
If you’re new to the process, focus on prep work and precise placement. Mark the desired location, smooth out wrinkles, and ensure a flat work surface before you begin. This approach aligns with the idea of attach embroidered patches thoughtfully, using the most suitable backing for your fabric and keeping edges neat for a professional look. In addition to careful prep, familiarizing yourself with terms like iron-on patches how-to, sew-on patches tutorial, and adhesive backing patches helps you decide the best method for your item.
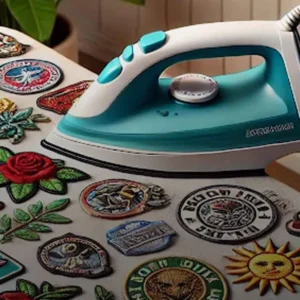
Iron-On Patches: Quick, Safe, and Effective
Iron-on patches offer a fast path to a bonded finish, making them ideal for cotton, denim, and similar fabrics that tolerate heat. Understanding the iron-on backing and heat settings helps prevent scorching and ensures a secure bond. When you know how to apply heat correctly, you can achieve a strong initial hold that lasts through normal wear and gentle washing.
For best results, test a small area and use parchment paper or a thin cloth to protect the fabric while applying pressure. The iron-on patches how-to approach emphasizes steady, non-sliding pressure and controlled timings (typically 10–15 seconds per area, with additional passes if needed). If you’re concerned about wash durability, you can reinforce the edge with a light stitch around the perimeter to blend durability with a clean appearance.
Sew-On Patches Tutorial: Durable Stitching for Longevity
Sew-on patches are renowned for enduring frequent washing and heavy use, especially on delicate or high-wear fabrics. The sew-on backing requires stitching around the edge to create a secure bond that stands up to stress and movement. Following a thorough sew-on patches tutorial helps ensure you don’t miss critical steps like alignment, tension, and edge finishing.
A steady sewing rhythm, matched thread, and appropriate needle choice are key. Use a dense, tight stitch around the patch edge, such as a backstitch, and consider a blanket stitch for a decorative touch that still provides safety against lifting. Finishing with secure knots and tucking thread ends inside the fabric reduces snagging and keeps the appearance clean over time.
Adhesive Backing Patches: Convenience with a Caution
Adhesive backing patches offer a no-heat option that’s appealing for fabrics sensitive to heat or for quick customization. While convenient, these patches may require reinforcement through stitching or glue for longer wear, especially on items that see frequent washing or friction. Understanding adhesive backing patches helps you weigh the trade-offs between ease and durability.
To apply, clean and dry the surface, remove the protective backing, and press the patch firmly for 30–60 seconds. Allow the adhesive to cure according to the product instructions and avoid washing for 24 hours if possible. For added security, you can reinforce the edge with a tight stitch or a light fabric glue along the outer edge, enhancing durability without needing heat.
Preparation, Placement, and Measuring for Precise Patch Positioning
Precise placement sets the foundation for a professional result, regardless of backing type. Use pins, fabric chalk, or a washable marker to map the exact spot, then test the layout to ensure balance and symmetry along seams or a central axis. Taking time with measurement and alignment reduces the risk of misplacement after pressing, sewing, or gluing.
A template or ruler helps maintain consistent spacing between patches when applying multiple motifs. Marking guides allow you to correct any misalignment before you commit to heat, stitch, or adhesive. By combining careful prep with these placement techniques, you’ll achieve a polished look that matches the project’s style and function.
Care, Maintenance, and Troubleshooting for All Patch Types
Once patches are attached, proper care extends their life. Wash inside out on a gentle cycle when possible, avoid high heat, and air dry when feasible. If you must use a dryer, select a low-heat setting and remove patches from hot areas to minimize heat exposure that could loosen edges.
Regular inspection helps you catch lift or curling early. If you notice any edge lifting, reseal the edge using the same backing method you chose, whether that’s adding a zigzag stitch around iron-on patches, re-stitching sew-on edges, or applying a thin layer of fabric glue along the perimeter for patches with adhesive backing. This proactive maintenance keeps your embroidered patches looking crisp and secure with continued wear.
Frequently Asked Questions
How do I attach embroidered patches using the iron-on patches how-to method?
Prep your fabric and patch, place the patch in position, cover with parchment paper, and press with a hot iron (cotton/high heat) for 10–15 seconds without sliding. Check the edges, re-press any lifted areas for 5–8 seconds, then let it cool completely. For heavy wear, reinforce with a zigzag stitch around the edge after heat adhesion.
What’s the difference between the iron-on patches how-to and sew-on patches tutorial for attaching embroidered patches?
Iron-on patches how-to uses heat-activated glue for quick, heat-based adhesion and is best on sturdy fabrics; it may loosen with frequent washing. Sew-on patches tutorial relies on stitching around the edge, offering greater durability on a wider range of fabrics and with repeated washing. Choose based on fabric, wear, and care needs, and consider reinforcing iron-ons with a stitch if extra security is desired.
Can I use adhesive backing patches to apply embroidered patches?
Yes, adhesive backing patches work on fabrics that tolerate glue. Clean and dry the surface, position the patch, peel away the backing, and press firmly for 30–60 seconds. Allow the adhesive to cure per product instructions and reinforce with stitching or glue around the edge for long-term wear if needed.
What prep steps are essential before applying embroidered patches?
Before attaching patches, wash and dry the item, press to remove wrinkles, and gather tools. Mark the placement with pins or chalk, test the patch on a small area if unsure, and decide on the backing type (iron-on, sew-on, or adhesive) based on fabric and intended wear.
How should I care for patches after applying embroidered patches?
Care by washing inside out on a gentle cycle when possible, and air-dry to minimize heat exposure. If you must use a dryer, use a low-heat setting and remove patches from hot areas. Periodically inspect for lifting and re-seal edges if needed to extend longevity.
What are tips to prevent patches from peeling or curling after attaching embroidered patches?
Ensure precise placement and apply heat uniformly without sliding. For iron-on patches, consider adding a light edge stitch for extra security; for sew-on patches, a second pass around the edge can help. If using adhesive patches, reinforce with stitching or edge glue and avoid heavy friction or washing immediately after application.
| Aspect | Key Points |
|---|---|
| What attaching patches means | Creates a secure bond between the patch and fabric to prevent fraying and peeling; three backing options exist (iron-on, sew-on, adhesive); the best choice depends on fabric and how the item will be worn and washed. |
| Backing options | Iron-on uses heat-activated glue; sew-on requires stitching; adhesive backings use a sticky adhesive. Each method has different care needs and durability depending on fabric and washing. |
| Materials & prep | Gather patches, a clean flat fabric, and backing-specific tools (iron, parchment paper, or needle and thread, etc.). Use a ruler/marker, a pressing cloth, and allow time for cooling and curing as needed. |
| Choosing backing by fabric | Denim/denim-like fabrics: iron-on can work well; delicate fabrics: sew-on is safer; avoid or reinforce heavy heat on heat-sensitive fabrics with adhesive or stitching. Consider wash durability and fabric compatibility. |
| Placement tips | Plan placement first, mark position, check symmetry for multiple patches, test a small area if unsure, and consider end-use (high-rub areas may need reinforced edges). Alignment along seams helps a balanced look. |
| Method 1: Iron-on patches | Prepare fabric, position patch, protect with parchment or cloth, apply heat (10–15 seconds), check edges, reheat if needed, let cool, and add optional extra security with stitching. |
| Method 2: Sew-on patches | Mark and pin patch, stitch around edge with a dense stitch or backstitch, maintain even tension, finish threads securely, and optionally add a second pass for durability. |
| Method 3: Adhesive backing patches | Position and remove backing, press patch firmly for 30–60 seconds, allow adhesive to cure per product, avoid washing for ~24 hours, optionally reinforce with stitching or light glue. |
| Care & maintenance | Wash inside-out on gentle cycle, air-dry when possible, avoid high heat near patches, inspect for lifting and reseal as needed. |
| Common mistakes | Skipping surface prep, skipping tests, rushing heat application, and misalignment. Prevent by proper prep, testing, following times, and careful placement. |
| FAQ quick answers | Most fabrics can work; iron-on durability varies with washing; adhesives’ longevity varies and may require reinforcement. |
| Conclusion | Choosing between iron-on, sew-on, or adhesive patches leads to a durable, polished finish when you plan placement, prepare the fabric, and follow method-specific steps. Understanding backing types helps you match the technique to fabric, use case, and care expectations for long-lasting results. |
Summary
Table above summarizes the key points about attaching embroidered patches across options, materials, methods, care, and common pitfalls. The subsequent conclusion reinforces how to pick the right backing and technique for durable, neat results.