
Custom patches provide tactile branding that customers notice and remember. From the jacket you wear to the bag you carry, brand patches create a lasting impression across product lines. This guide explores how to approach custom patch design, select the right materials, and navigate the patch production process to achieve consistent brand storytelling. A well-crafted patch communicates quality and identity at a glance, turning a simple accessory into a miniature brand ambassador. By following a deliberate design workflow, you can transform a logo into a patch that travels with your audience.
Viewed through an alternative lens, these wearable identifiers function as branding badges, logo patches, or emblem patches that extend your message onto apparel, bags, and gear. As portable brand assets, they act like insignias or crests that reinforce recognition wherever people encounter your products. The choice between embroidered, woven, or printed finishes influences texture, durability, and how a mark communicates your story. Designing with an ecosystem mindset—color, shape, and size—helps ensure each item speaks the same visual language across channels. By pairing these alternative terms with a clear production plan, you can roll out patches at scale while keeping a cohesive brand narrative.
1) The Power of Custom Patches in Brand Identity
In today’s crowded market, patches act as tactile branding that sticks. They serve as wearable ambassadors for your brand, offering durability and a memorable presence on jackets, bags, hats, and merch. When customers encounter a well-designed patch, they carry a tangible reminder of your values and story, turning simple merchandise into lasting brand impressions.
To unlock their full potential, treat patches as micro-messages of your brand ethos. The process starts with a clear brief and a thoughtful custom patch design that translates brand voice into a compact emblem. By aligning patch aesthetics with your broader marketing strategy, you create a cohesive experience that travels with your audience.
2) Designing Patch Artwork: From Concept to Clear Visual Language
Effective patch design begins with a strong concept that embodies your brand identity and resonates with your audience. Consider the patch form, color, texture, and scale to ensure the design remains distinctive up close and legible from a distance. This stage lays the groundwork for a standout emblem that can anchor your entire product family.
Next comes the practical development of scalable artwork that translates across fabrics and products. The emphasis is on legibility, consistency with brand guidelines, and a clean visual language that works whether embroidered or woven. By focusing on an emblem that captures your core message, you pave the way for a durable, versatile patch system.
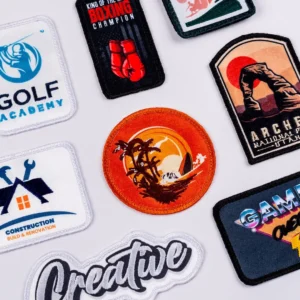
3) Choosing Patch Type: Embroidered, Woven, and Beyond
Patch types each convey a distinct look and feel. Embroidered patches offer a classic, textured presence with raised threads that read well on apparel, while woven patches deliver sharp detail suited for intricate logos. Printed patches enable photographic imagery and gradients, and chenille or leather patches bring unique textures and premium impressions. When selecting, consider how the patch style supports your brand’s tone and product lineup.
The choice of patch type directly influences the patch production process, cost, and performance on fabric. For premium branding, embroidered or woven patches are often most effective, but testing different options can reveal the best fit for your audience and use cases. A thoughtful choice should align with your storytelling goals and the practical realities of wear and care.
4) Color, Shape, and Sizing: Crafting Visual Impact
Color psychology plays a crucial role in patch design. Bold, high-contrast palettes grab attention, while restrained tones convey sophistication and longevity. Shape also reinforces identity: round patches can feel approachable, shield shapes project strength, and custom shapes create a distinctive brand fingerprint.
Size matters as much as color and shape. A patch that is too small may lose detail, while one that’s too large can overwhelm the item. A practical starting point is a 2–3 inch diameter for apparel patches, with adjustments for caps, bags, or jackets. Testing across product specs helps ensure your patch remains legible and impactful in real-world wear.
5) The Patch Production Process: From Digitization to Packaging
Understanding the patch production process helps plan timelines and budgets. The workflow typically begins with artwork digitization, translating the design into a embroidery file that defines stitch types, thread colors, underlay, and density. Clear digitization reduces production time and improves patch quality.
Following proofing, you select backing and fabric, then proceed to embroidery or weaving, cutting, finishing, and quality control. Packaging and shipping round out the cycle, delivering patches ready for sale or distribution. Knowing these steps helps you set realistic timelines and vendor expectations while maintaining consistency across runs.
6) Implementing Patches for ROI: Scaling Brand Patches Across Products
Patches offer a strong value proposition for brand-building, extending recognition across apparel, accessories, and promotional items. Start with a pilot run to test 100–300 patches, gather feedback, and refine your approach before a broader rollout. Track engagement, resale value, and brand recall to quantify the impact of your patch program.
A strategic, consistent patch family—whether you’re focusing on brand patches, emblem patches, or a combination—helps reinforce identity across channels. Use the insights from pilots to optimize color, size, and placement, and plan staged releases that align with campaigns or product launches. When deployed thoughtfully, custom patches evolve into durable branding assets that travel with your audience.
Frequently Asked Questions
What are custom patches and how can they strengthen my brand identity?
Custom patches are fabric badges you attach to products like apparel and bags. They act as wearable ambassadors and come in brand patches or emblem patches to reinforce recognition. They communicate quality and brand story at a glance, and fit neatly into a strategic patch production process that includes artwork digitization, proofs, material selection, embroidery or weaving, cutting and finishing, quality control, and packaging.
Should I choose embroidered or woven patches for my brand patches?
Embroidered patches deliver a classic, raised texture and strong durability, while woven patches offer sharp detail and clean edges for complex logos. The decision affects cost, look, and how your design translates on fabric. In your custom patch design, consider logo complexity and size, and reflect these choices in the patch production process to determine texture and edge finishing.
What are the essential steps in the custom patch design process to create a standout emblem?
Start with a clear concept that reflects your brand identity, ensure scalable artwork and legible typography, and choose a color palette that works across fabrics. Decide on the patch shape and size and align with brand guidelines. These design decisions feed into the patch production process, with proofs used to verify color accuracy and scale.
How can patches be used across product lines to maintain brand consistency?
Use a cohesive set of patches—brand patches and emblem patches—that share a visual language across apparel, bags, hats, and uniforms. Create a family of patches that communicates different stories (campaigns, milestones) while remaining instantly recognizable. This approach leverages the patch production process to scale consistency and impact.
What factors influence the cost and timeline of patch production?
Costs and lead times depend on patch type (embroidered, woven, printed), size, quantity, and design complexity. Embroidered patches typically have higher per-unit costs than woven patches for small runs but convey durability and a premium feel. When selecting vendors, consider minimum order quantities, lead times, proofs, color matching, and the ability to provide samples during the patch production process.
What should I test before launching a full patch program?
Test the digitized artwork and request proofs to confirm color and scale. Check colorfastness and wash durability on target fabrics, evaluate backing options (iron-on, sew-on, self-adhesive), and verify edge finish quality. Start with a pilot run of 100–300 patches to gather feedback before a full rollout.
| Aspect | Key Points |
|---|---|
| Why patches matter for brand identity | Patches act as wearable brand ambassadors, offering durability and craft. They help unify merchandise and reinforce brand recall; viewed as a micro-presentation of your ethos. |
| Key benefits of using custom patches | Longevity and visibility; Enhanced perceived value; Storytelling and consistency; Cross-channel branding across apparel, bags, hats, uniforms, and promos. |
| Planning your patch design: the foundation of a standout emblem | Start with a clear concept aligned to brand identity and audience. Consider patch form, color, and texture for up-close and distant viewing across fabrics and product lines. |
| Emphasize the core message | Convey a core message or symbol that’s instantly recognizable. Ensure legibility and fidelity to your brand’s visual language; use scalable artwork and a suitable color palette. |
| Material selection and finish: embroidered vs. woven, and beyond | Common patch types: Embroidered, woven, printed, chenille, leather. Each affects production, cost, and fabric translate. For premium branding, embroidered or woven patches are typically best. |
| Color, shape, and size: creating impactful patches | Use high-contrast colors and brand-aligned shapes. Start around 2–3 inch diameter for apparel; adjust for different products. |
| Positioning and use cases: where patches shine | Place on chest, sleeve, or back for apparel; focal points on bags/hats; denote rank or milestones on uniforms or events. Aim for a consistent patch family across lines. |
| The patch production process: from concept to finished patch | Workflow: 1) artwork/digitization 2) proofing 3) material and backing 4) embroidery/weaving 5) cutting/finishing 6) quality control 7) packaging/shipping. |
| Financial considerations and vendor selection | Costs vary by type, size, quantity, and complexity. Embroidered patches cost more than woven in small runs but offer a premium look. When selecting vendors, evaluate minimums, lead times, color matching, proofs, and samples. |
| Design tips to maximize impact | Keep designs clean; use high-contrast colors; align with brand guidelines; include a strong emblem; plan for versatility across product types. |
| Real-world applications and case ideas | Streetwear: bold embroidered patches as signature pieces; corporate lanyards or apparel for events; nonprofits: patches honoring supporters; stories of impact through patch design. |
| Creating your patch roadmap: steps to take next | Define goals; gather assets; choose type/size; work with an experienced vendor; launch a pilot; measure impact. |
Summary
Conclusion